Kalley Krickeberg is a world-class equestrian, trainer, and clinician known for her Balanced Horse Training program, which blends elements from dressage, reining, hunter/jumper, ranch horse work, and barrel racing. With roots in Polo and a background in Natural Horsemanship, Kalley has a particular gift for working with foals, young horses, and rehabilitating troubled horses. She is the patent holder and creator of the Horseman's Halter and Foal Line, developed in partnership with Weaver Equine. Based at Triple Crown Equestrian Center in Lincoln, California, Kalley offers clinics, lessons, and educational content focused on creating balanced, confident horse-and-rider partnerships.
For more information on Kalley’s Balanced Horse Training go to www.KalleyKrickeberg.com or find @TheBalancedHorse on Instagram.
The Foundation of Halter Training
Successfully halter training a foal is about building trust, shaping understanding, and laying the groundwork for a calm, confident equine partner that responds positively to pressure.
Kalley Krickeberg’s five-stage foal halter training is a thoughtful, low-stress method that respects the sensitivity and instincts of the young horse. The goal is to build a foundation of harmony and trust that guides a lifelong relationship between horse and handler.
Here’s what Kalley focuses on in the early days of a foal’s life to not just halter train a horse, but to set them up for success in future training.
Before You Begin: Three Rules to Remember
1. The mare’s attitude matters.
Foals are tuned in to their dams, especially in those early days. If the mare is relaxed and accepting of human interaction, her foal is far more likely to mirror that calm behavior. But if she’s anxious, protective, or unsure (which is common with maiden mares), that defensiveness can easily rub off.
This doesn’t mean you can’t work with the foal if the mare is standoffish or defensive, but it does mean your progress may be slower, and you’ll need to work more carefully to earn the foal’s trust independent of the mare’s behavior.
2. Short, positive sessions are most effective.
Foals tend to stress easily and have very short attention spans. If they become overstimulated, the session loses value and it may even make the next one more difficult. Keep sessions brief—just a few minutes—and try to wrap up before the foal becomes overwhelmed.
Progress isn’t about doing it perfectly, it’s about getting better.
3. Start as early as possible.
Kalley recommends beginning halter training when foals are just a day or two old. At that point, they’re physically and mentally easier to manage. If you wait even a week, you may need to skip to Stage 3 or 4 to ensure the session remains safe and productive.
Stage 1: Curiosity, Connection, and the Power of Touch
The first step in halter training is about curiosity and connection.
Part 1: Encourage Interaction
In the earliest days, your goal is to become part of the foal’s world in a positive, non-threatening way. Kalley encourages handlers to engage a foal’s natural curiosity through calm, kind interactions.
Enter their space calmly and offer scratches in areas that naturally feel good, like the chest, neck, and back. Many foals enjoy the rump as well, but this can easily become a “buck button,” so it’s best to be selective about where you touch.
This phase isn’t about structured training. It’s about building a bond that makes future steps less stressful for the foal.
Part 2: Introduce Yielding to Pressure
Even without tools or equipment, you can start teaching pressure and release. Kalley uses her arms like a fence—providing light, directional pressure and then releasing it when the foal responds.
There’s no holding or sustained contact, just a signal, a response, and space. This helps the foal understand the core concept: pressure goes away when they yield.
Stage 2: Big Loop Introduction with the Horseman’s Foal Line
At this point, Krickeberg introduces one of the most valuable tools in her program: the Horseman’s Foal Line.
This line is made from soft, high-quality yacht rope that’s lightweight, strong, and easy for the foal to feel without being abrasive or intimidating. It’s 20 feet long, with a loop at one end and a popper at the other, making it highly adaptable.
The Setup: The Big Loop
- Start by looping the rope loosely around the foal’s neck and shoulders.
- Let it slide back so it rests below the buttocks and above the hocks.
This creates a full-body “hug” that gives you influence without restriction. The foal is still free to turn, back, and move as they wish—but now you’re beginning to communicate from a short distance.
What You’re Teaching
This is the first time the foal will feel pressure that doesn’t come from a person’s body. Your goal is to teach them to:
- Drop their nose over the rope instead of resisting
- Step toward the handler to relieve pressure
Standing between the foal and its dam supports this step, as they naturally want to move toward their mother. This stage is more mental than physical, as it introduces how to think through light pressure rather than react to it.
Stage 3: The Girth Loop and First Feel of a Halter
 This stage marks the transition from passive learning to more intentional control.
Part 1: Use the Girth Loop
Move the loop so it wraps around the foal’s barrel and comes up between the front legs—mimicking the feel of a future cinch or girth. This setup lets you guide the foal’s front end and discourages backing up or flinging sideways.
Caution: This increases pressure. If your foal hasn’t mastered the earlier steps, they may panic. Proceed only if they already understand how to yield.
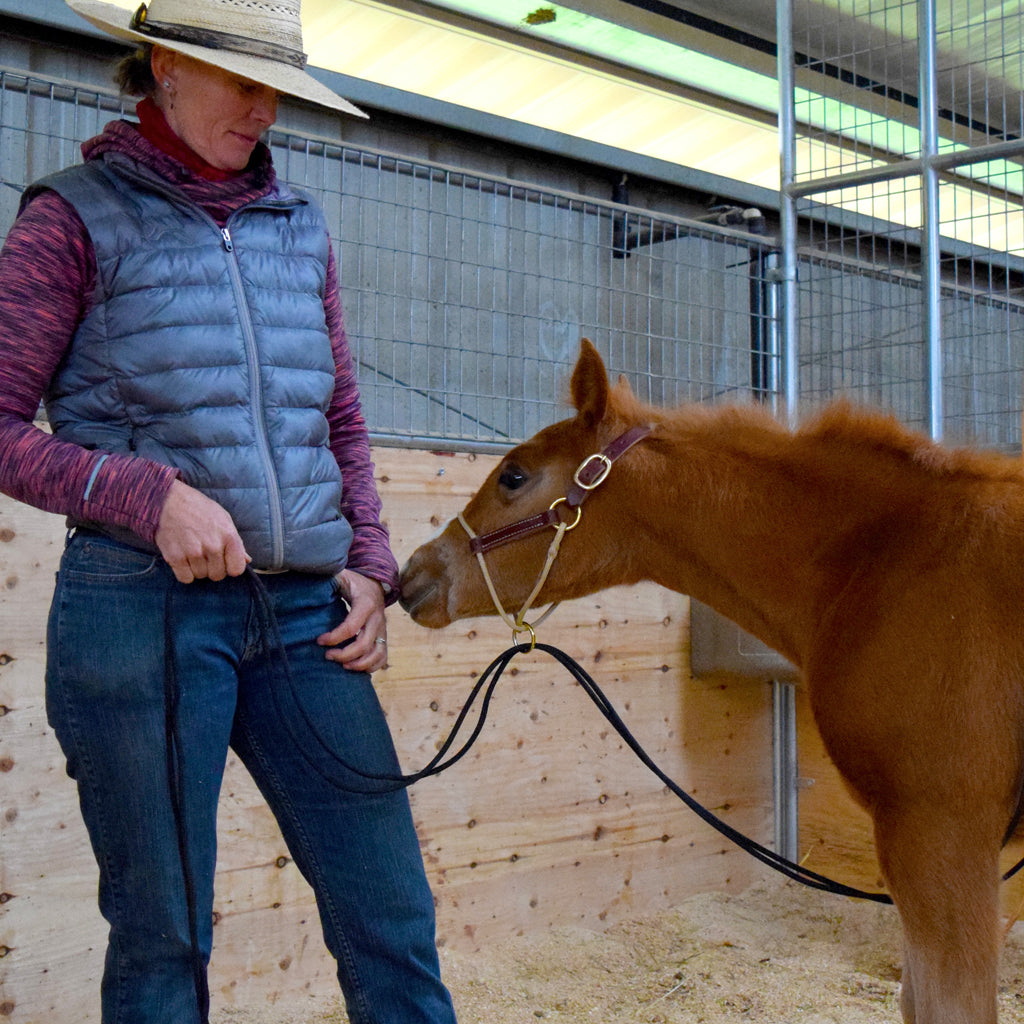
Part 2: Introduce the Foal Halter
This is also the time to let the foal experience the Horseman’s Foal Halter. Begin by letting them wear it with no expectations.
Once they confidently respond to forward, left, right, and stop using only the girth loop, you can run both ends of the loop through the halter ring. This introduces pressure to the head and face, so go slowly and remain sensitive to the foal’s reactions.
This configuration applies soft, consistent pressure. Thanks to the halter’s sliding ring, cues don’t twist or torque the foal’s head, allowing them to learn more quickly and without confusion. The signal mimics a snaffle bit by transferring pressure to the opposite side, creating a clear cause-and-effect relationship for the foal.
Stage 4: Poll Pressure and the Neck Rope (Optional but Powerful)
This stage introduces pressure at the poll, one of the most sensitive areas to work with. Done right, it can deepen understanding. Done wrong, it can trigger rearing or flipping.
Part 1: Tie the Neck Rope with a Bowline
CAUTION: If you aren’t confident tying the Bowline Knot, use Alternative Stage 4: Suitcase Figure 8 Loop, to reduce the chance of choking the foal.
Using a Bowline Knot (which won’t tighten under pressure and choke the foal), tie the rope loosely around the foal’s neck, just behind the ears.
This applies pressure at the poll, where a bridle or headstall will later sit. If the foal is already confident, the freedom to move left and right helps them stay relaxed. As always, light pressure should be followed quickly by release.
Part 2: Combine with the Halter
Next, run the neck rope through the halter ring. This allows you to give soft directional cues and adds a new layer of communication through poll pressure. The occasional movement of the rope lower on the neck provides natural breaks in pressure, helping the foal stay relaxed and engaged.
Alternative Stage 4: Suitcase Figure-8 Loop
 If you don’t want to use the neck rope, Kalley recommends creating a Suitcase Figure-8Loop. This setup involves:
- Wrapping the line below the foal’s hindquarters
- Crossing it over the withers
- Bringing the ends forward and through the halter ring
This full-body support helps the foal stay centered and learn to follow halter pressure with confidence. A butt rope can also be used here to encourage forward motion, especially if the foal tends to freeze or hesitate.
Stage 5: Leading from the Halter
This final stage of the Kalley Krickeberg process is where it all comes together.
Now, the Horseman’s Foal Line is clipped or tied directly to the ring of the foal halter. Your foal should already:
- Yield to light pressure (around 4 ounces—the weight of a small apple)
- Stay calm even when mistakes happen
If either of those pieces is missing, go back and reinforce the appropriate stage. A soft, thoughtful response is the foundation of successful halter training.
Once your foal is ready, begin by leading behind the mare in a small enclosure. Gradually expand the space until you’re working in an open pasture. The 20-foot line offers plenty of freedom while still allowing you to set clear limits.
Final Tips: Your Mindset Shapes the Process
Foal halter training isn’t about dominance or control. It’s about partnership, patience, and communication. When you approach each session with the right tools and mindset, the results go far beyond a foal that walks on a lead, they learn to trust, think, and stay soft under pressure.
Kalley’s process gives you a roadmap to halter breaking that’s progressive, adaptable, and rooted in respect for the horse. With support from thoughtfully designed gear like the Horseman’s Foal Halter and Horseman’s Foal Line you’re setting your colt or filly up for a lifetime of confident handling.